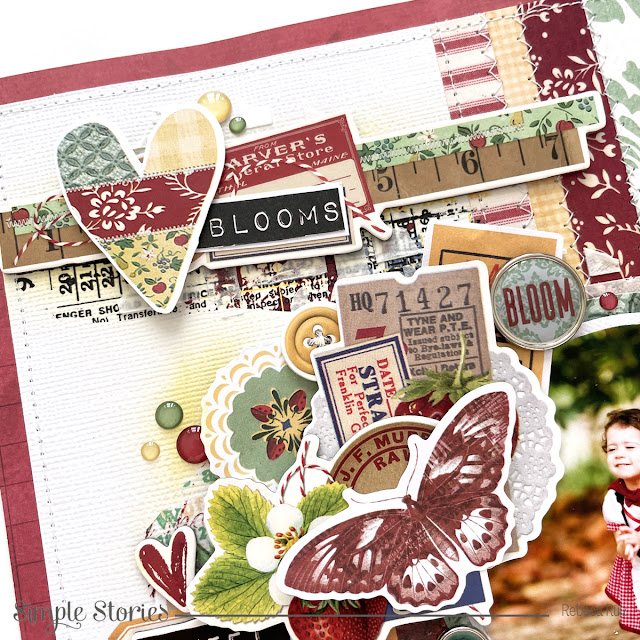
Hello friends! I'm here to share with you an elegant and sweet layout using the beautiful Simple Vintage Berry Fields collection by Simple Stories. I love scrapbooking my daughter's photos and when I saw this collection, I remembered these pictures of my daughter dressed as Little Red Riding Hood, for a photo session of her second birthday. It was a lovely and fun day that she enjoyed, and what better way to document it than using this gorgeous collection to create a layout with a little bit of mixed media and lots of textures and layers. Now, I invite you to stay with me during this post to learn how I made this layout, and if want to see the process video, jump to the end of this post to watch it!
To try something different, I used two circle photos in different sizes. I used circle thin dies to cut them and their mats, which is a green paper from the 6" x 8" pad. For the background I used a white cardstock and matted it on a red paper from the Vintage Basics Kit. For the background I added yellow ink using a stencil brush. On top of the paint, I added pieces of the rub-ons in three areas, then used the stencil and light modeling paste to give the layout a subtle texture. When it was ready, I added a few pieces of patterned papers mixed with strips of washi tape, all from the Simple Vintage Berry Fields collection.
This collection has papers with a quilted look using zigzag stitches, so I decided to replicate this look by stitching in between each strip using a zigzag design and then straight stitches on the sides strips and around the layout. After that, I added the photos and the foam title.
You may have noticed that I love to create clusters using different products, and this time I made three of them. On the top left corner, I used chipboard and stickers. On the left side of the photo, I used die cuts from the different packs, stickers, chipboards, foam, brads, and enamel dots. I love how the clusters look and how they give the impression of being bulky, but the truth is they are not that bulky and can be stored in a page protector without any problems. To create this effect, I used foam tape in strategic areas to give them dimension; but be aware: they are not all in the same place.
As you can see, there are so many textures in this layout that it is impossible to not notice them, and this collection certainly enhances the photos!
Thanks for your visit, I hope you like and enjoy this layout as much as I do, and it inspires you to craft!


No comments