How are you? Hope you are healthy and having a great day! I'm happy to share with you today a new layout I created using Pinkfresh Studio's Happy Bloom collection. I bought this collection when it was released, maybe last year, and only made one layout with it, but when I saw this photo of my daughter I knew they would work perfectly together so I searched for it in my stash. This layout came together pretty quickly, which I love. While making it, I recorded the process video, which is available at the end of this post.
I started this layout by preparing the white cardstock with clear gesso. When the gesso was dry, I reduced the cardstock to 11 1/2" x 11 1/2" and distressed the edges. Then, I added Shimmerz' Pink paint diluted in water to the background using an acrylic block. After that, I used a TCW stencil and Shimmerz Dazzlerz Sea U in the Mornin' paste to add texture to the background. Finally, I added paint splatters using the same Pink paint and Miner Miner 49er.
While the background was drying, I took a bunch of flowers from the die cut pack and fussy cut around them to reduce the thick white border they have. To me, the thin white border looks more delicate and elegant.
Now that the background and the flowers are ready, I chose papers from the collection and cut them to create a cluster of papers in the middle of the layout. To some of them, I cut the edges in a "V" shape to give the aspect of a banner and distressed all their edges. By doing this, I add texture and interest to this area of the layout.
In the next photo you can also see the layers of paper. I love how they look!
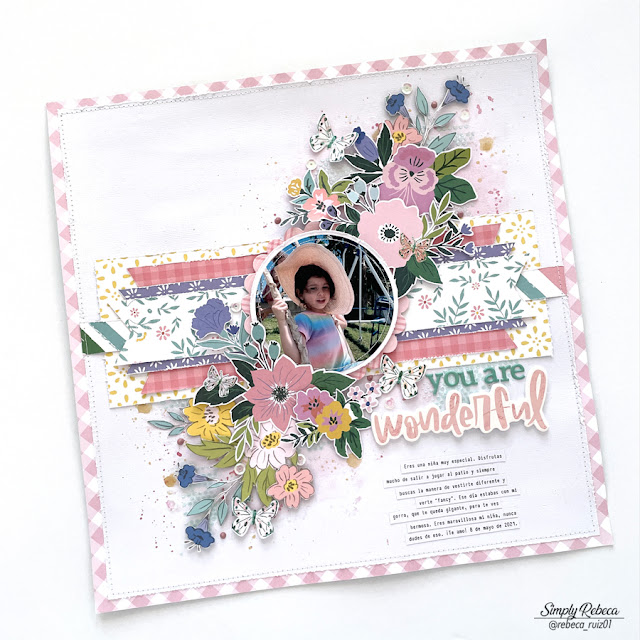
You can also see how I used a circular photo, matted in white cardstock and a pink scalloped circle. They were all cut using Spellbinders dies. As an additional texture and touch, I machine stitched around the photo using white thread.
When the papers were ready, I machine stitched a white border around the layout and proceeded to embellish it. For that, I used the flowers I fussy cut from the die cut pack and a yellow flower I cut from one of the papers. To add the flowers and butterflies I used liquid adhesive and foam tape. This way, they are not flat making the layout more interesting and pretty.
After that, I added the title using puffy letters from the same Pinkfresh Studio collection and a foam word from Simple Stories. For the journaling, I printed it in white cardstock, cut it in thin strips and added them to the layout using liquid adhesive.
Now it's time for those little details that I love to add to my projects. This time, I added a few clear and white sequins.
Also, a few Nuvo Drops in Dusty Rose and glitter on top of the butterflies using Stickles. With that, I finished this page and let me tell you, I really love how it looks, but sadly the photos don't do this layout justice. When you see it in person, you can see and feel all the textures, layers, and details. It really is gorgeous!
Thanks for your visit, I hope you like and enjoy this layout as much as I do, and it inspires you to craft. Have a wonderful day and come back soon for more inspiration!


No comments